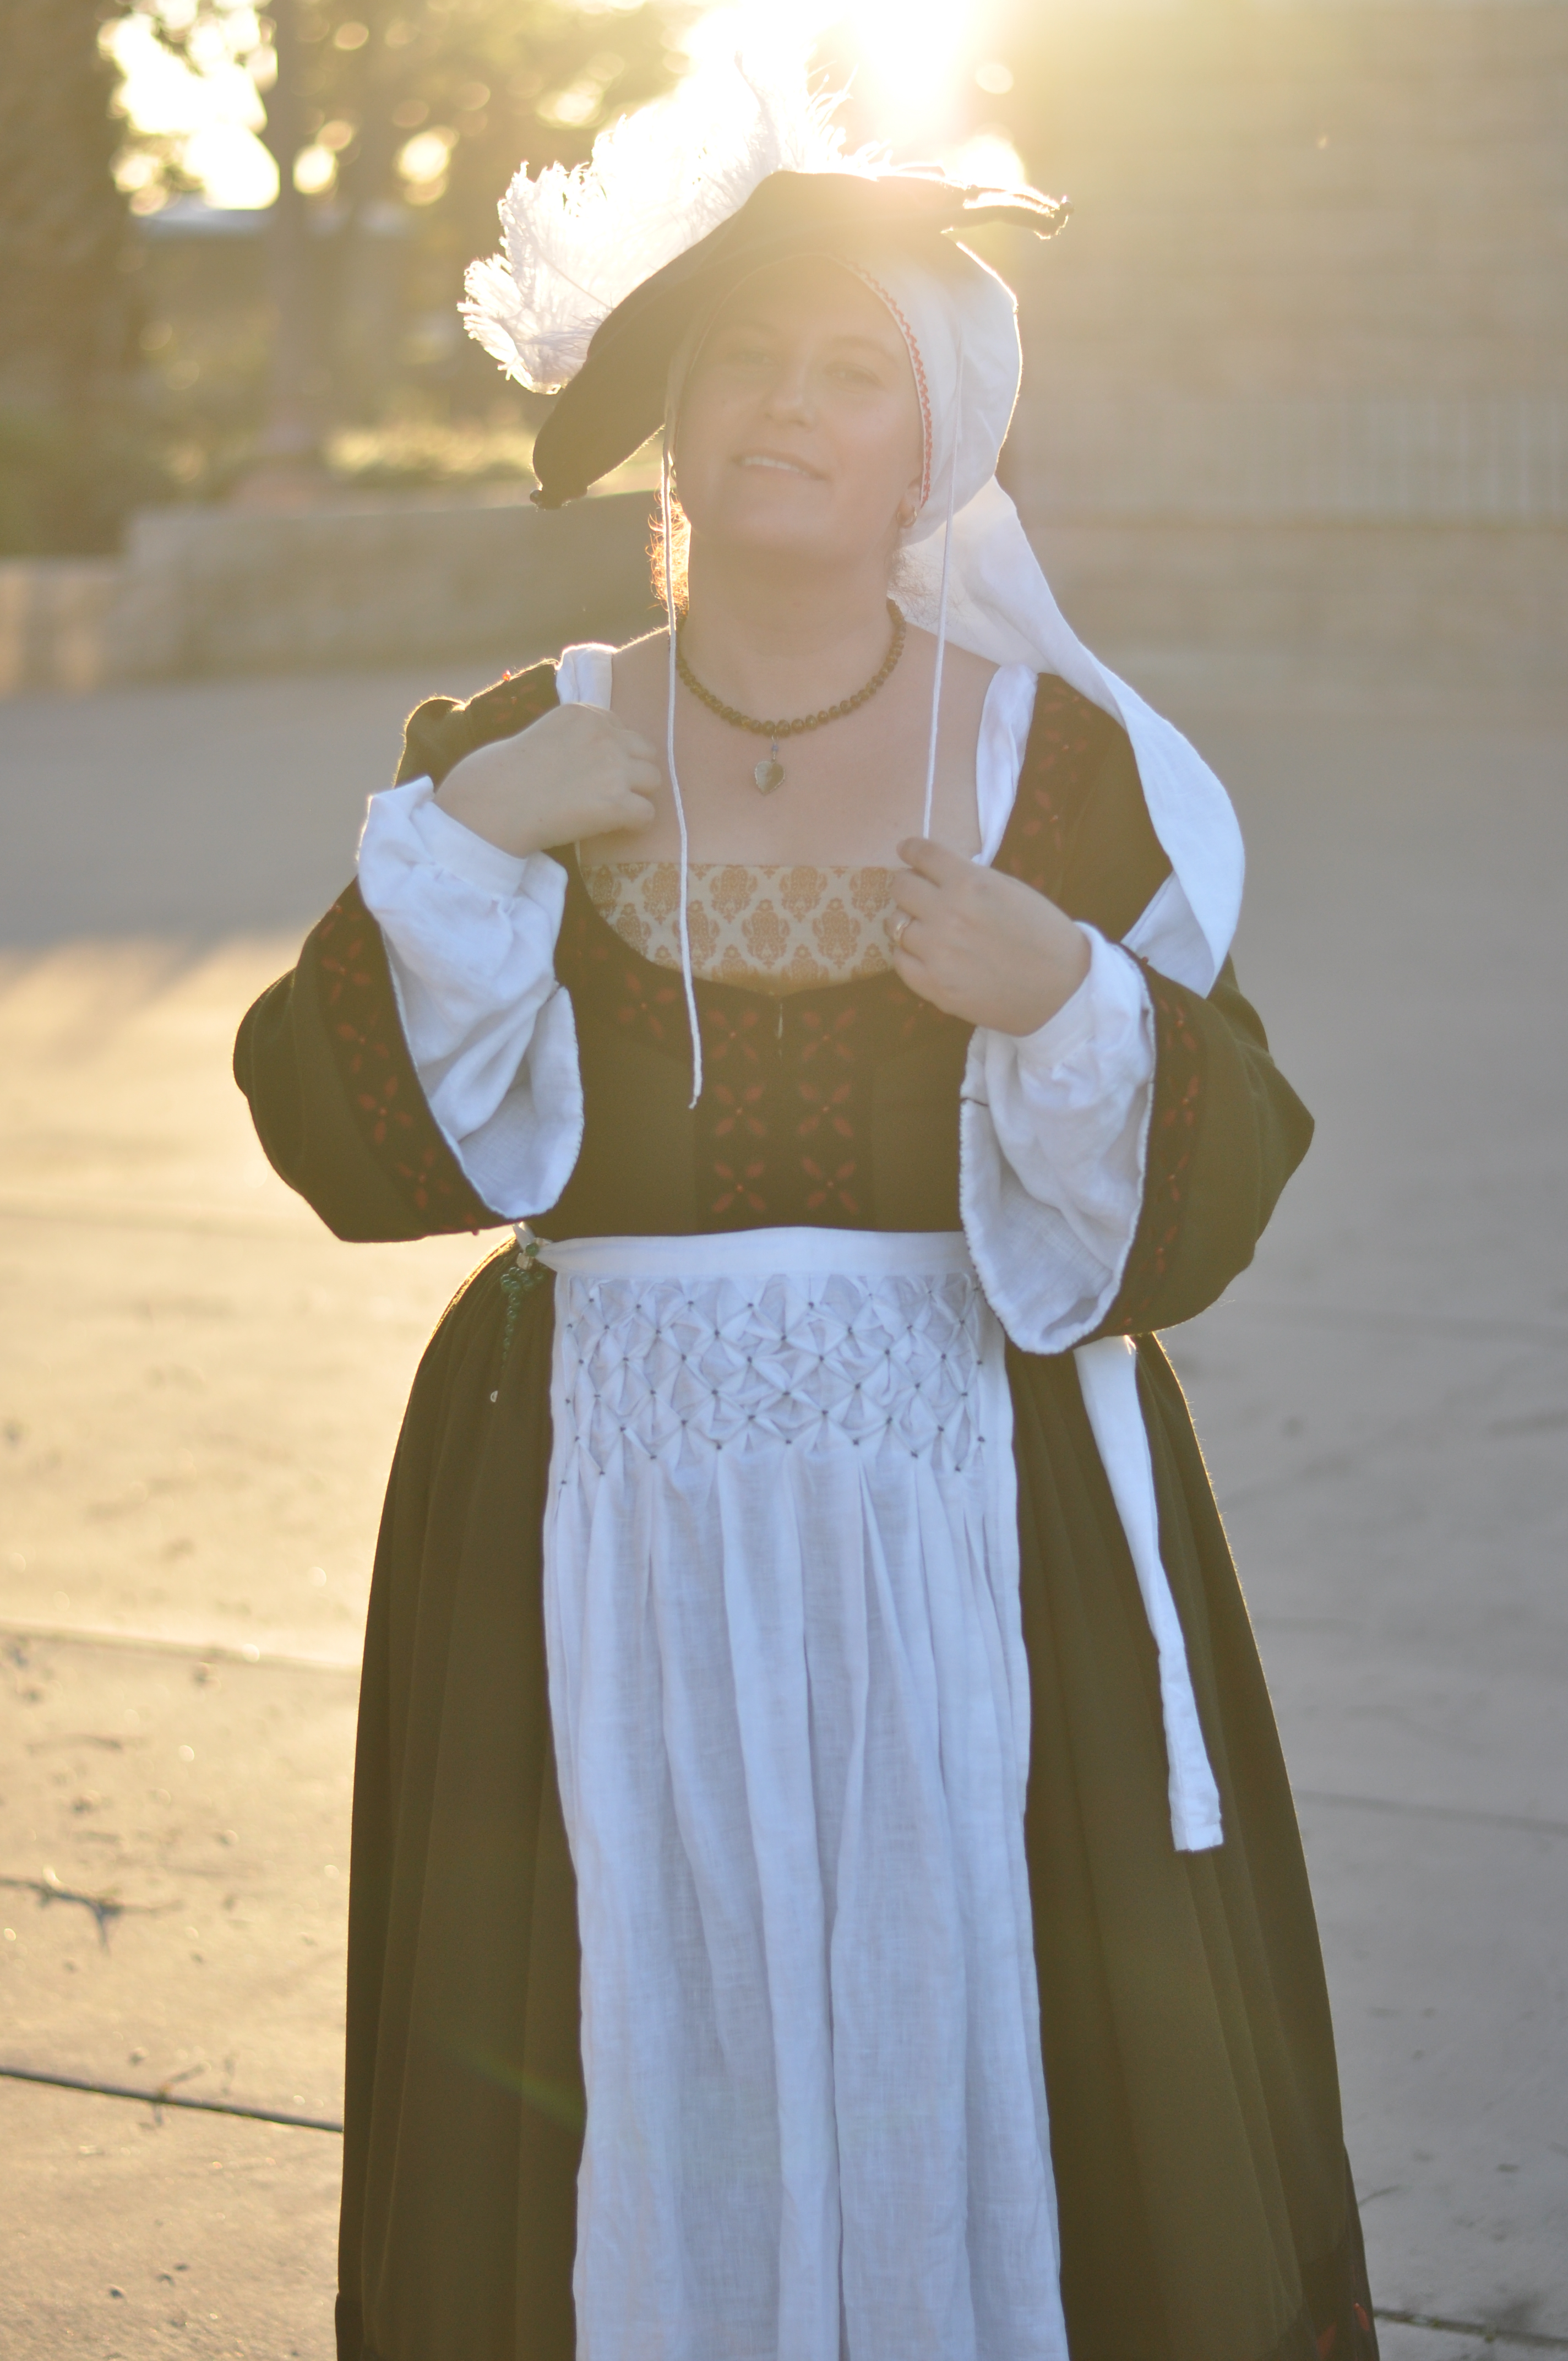
After much delay, It’s time for the second installment of the Wool Saxon gown. I wore this gown to the West Kingdom 12th night in Sacramento, and it was a huge hit. It felt like the perfect gown to be inducted into the Order of the Golden Poppy.
Wool and velvet Saxon gown
I didn’t copy any one gown specifically, but I looked around at German styles from about 1520. Here are my inspirations.

My inspiration for the sleeves and guards

I love the gold brustfleck and sleeves

I love the cut of the gown and the brustfleck

I like the lines of this dress
So let us begin, naturally, at the beginning.
First I started off drafting and sloping a bodice using the above portraits as inspiration. I cut out 2 separate halves out of a heavy canvas. I have here 2 different cuts for the neckline, I wanted to see what I liked better, and to try it on and make sure that the front was at the right length.
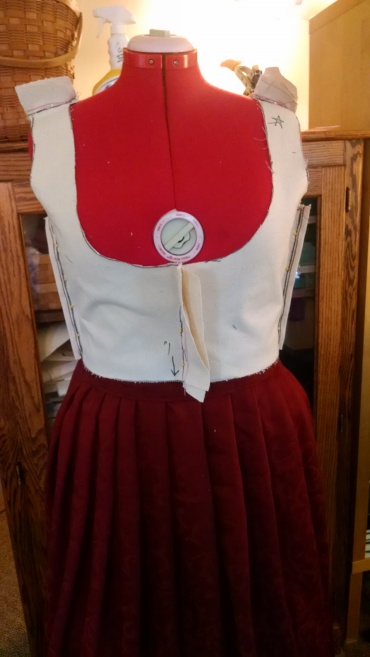
The neckline on our right was the one that I liked the most. It seemed to follow the portraits more closely.
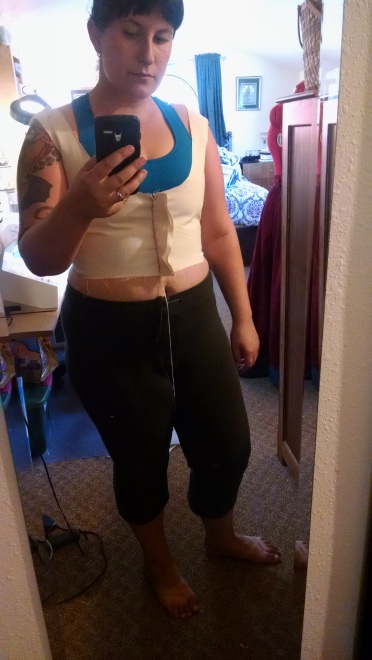
Here I am checking the fit. The front could do to be about a half inch longer, but overall it works.
After I was happy with the canvas toille, I cut out the linen lining, the heavy canvas interlining, and the green wool and stitched them all together, treating all 3 layers as one piece of fabric.

All the layers are stitched by hand, and then folded over and tacked down.
… and testing it on the form. I hope you figured out by now that I obsessively test almost every step.
Now I needed to install lacing strips and channels for the supportive zip ties.
I got this great suggestion from the Elizabethan Bees Facebook page after my frustration with cane, reed, and other wooden methods of stiffening. Wood can splinter and snap, you can’t really get it wet and of course once it bends out of shape, you can’t put it back. Modern spring steel is way too stiff for these purposes, and can tend to be uncomfortable. I used heavy duty zip ties from my local hardware store for the stiffening, and you can easily cut them with scissors and round them off without any effort at all, so big bonus!
For the lacing rings, I used an awl to puncture a hole and used very strong thread around a ring to keep it open and give it even more strength. This all had to be done by hand, and reinforced because this was the one thing that was going to take the most abuse.
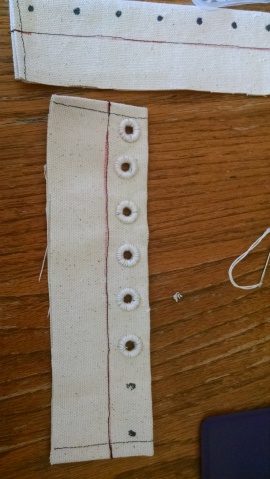
Reinforcing the eyelets with rings and heavy thread
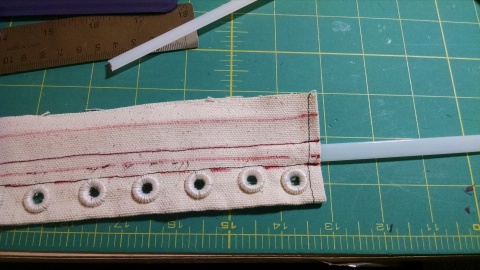
inserting the zip ties into the channels.
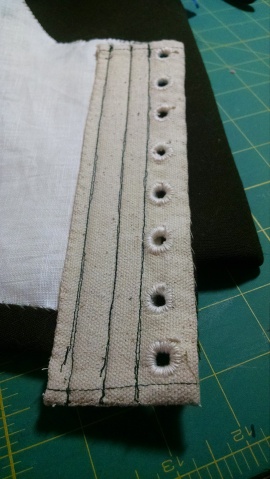
Sewing the lacing strip down into the bodice. I ran this through my machine for a quilting effect.
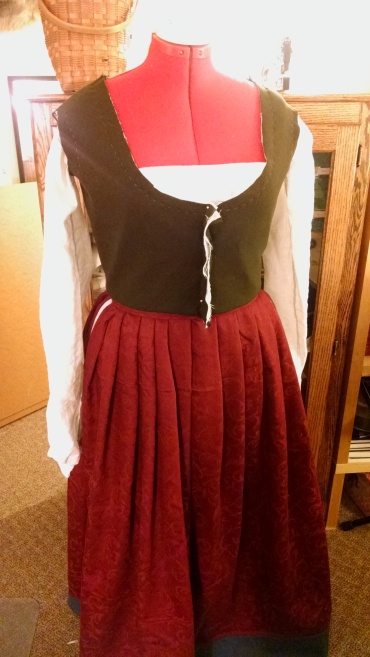
Time for guards! I decided to use a really pretty red cotton brocade as the base layer. You can’t see the brocade very much in this photo, but it’s the same fabric as my red petticoat without bodies from earlier (the red skirt with the blue band on the bottom). First, I made a paper pattern by laying it down over the bodice to make sure I got the curve right. I then cut two mirrors out and pinned them into place, once again, checking to make sure that everything was lining up and laying properly. I like this red and green combo though! I almost regretted not switching the red and black at this point, but I didn’t have any red wool or velvet for the guards then.
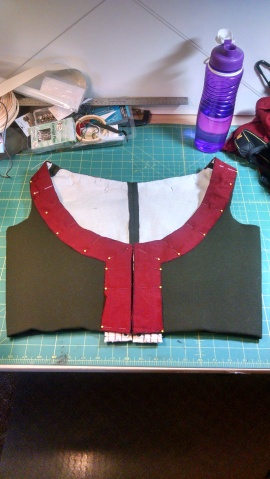
Red gaurd lining pinned into place, you can see the lacing strips extending past the bodice to help keep the lower tummy flat.
Checking the guards on the dress form.
Now for the hand-numbing and cramp-inducing part! (yaaaaay). So, in period, tailors had these really cool sharp stamps that they would use to cut out the pattern in one strike of a large hammer. I don’t have a die, a lead sheet, or a very large hammer. So I was stuck with making a stencil and then using some tiny scissors to cut out each. Individual. Little. Leaf. Needless to say, this was my least favorite part of the gown. After I cut out the velvet, I used fray-check to help reduce any fraying. If I had used wool, then the felted nature of the wool would make fray check or hemming unnecessary. I sewed a red glass bead in the center to help tack everything down and then applied it over the red base.

Starting the cutouts on the back of the velvet.

Pinned down and ready to sew

One side done. You can see the quilting on the other side!

And done! Closes shut perfectly.
Now, even with obsessive checking and measuring, mistakes can still happen. Somehow, one of my guards ended up about an inch too short in the back! I was really bummed out, but there was no way I was going to remake an entire guard and go through all THAT again. So I thought, what would they do in period for oopsies? They would make a patch! So I just cut out a little trapezoid and sewed it down. Asides from it being a little asymmetrical in the back, its perfect. No would even know! It bugged me for all of 10 minutes before I remember the cramping in my hand and I promptly forgot about it.

Oopsie!

Oopsie fixed with a patch.
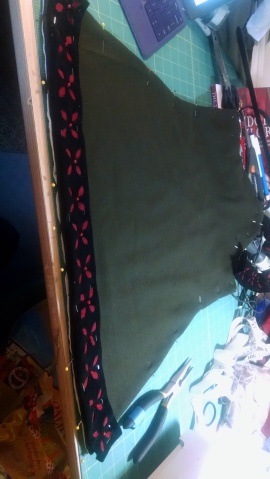
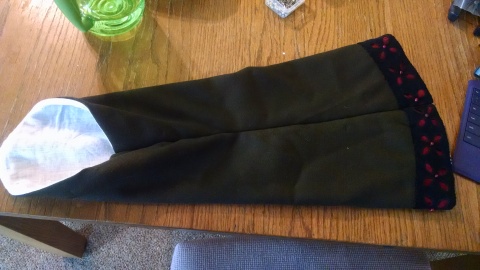
Now that the bodice was complete, it was time to move on to the skirt! I had to make 3 panels of wool at about 150 inches wide each. So that’s a lot of fabric! The guards for the skirt were done the exactly the same as the bodice, but blown up and wider. I also machine sewed around the edges of the leaves in case my skirt caught something while I was walking by, it wouldn’t rip out and tear.

The skirt was too short, so I cut it horizontally to add a red stripe for the guards and to lengthen it.

The skirt at the right length, with the red guard backing.

More cutting out!

Machine sewing the edges so that I don’t snag the holes on accident.

Guards ready to be sewn down!

One panel finished! 2 more to go….

All 3 panels complete!
Now that the panels of the skirt were finished, it was time to cartridge pleat! I could have also done rolled pleats, but the amount of math involved hurt my brain, so I decided to do something much simpler. I used this heavy striped cotton to help me make even pleats. I just ran my needles in and out with the pattern of the stripes. It also makes a very nice stiff edge so the skirt hangs properly, and finishes the skirt in one step. I then just divided up the yardage evenly about the bodice edge and used a very strong thread to tack the outer pleat to the bodice bottom.

Pulling the pleats tight.

Sewing down the pleats to the bodice.

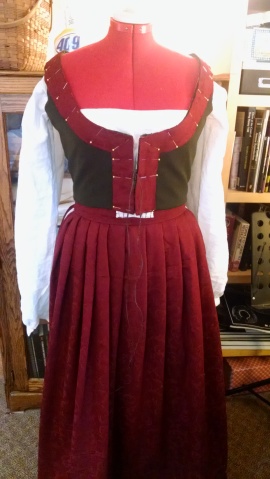
Skirt is attached!
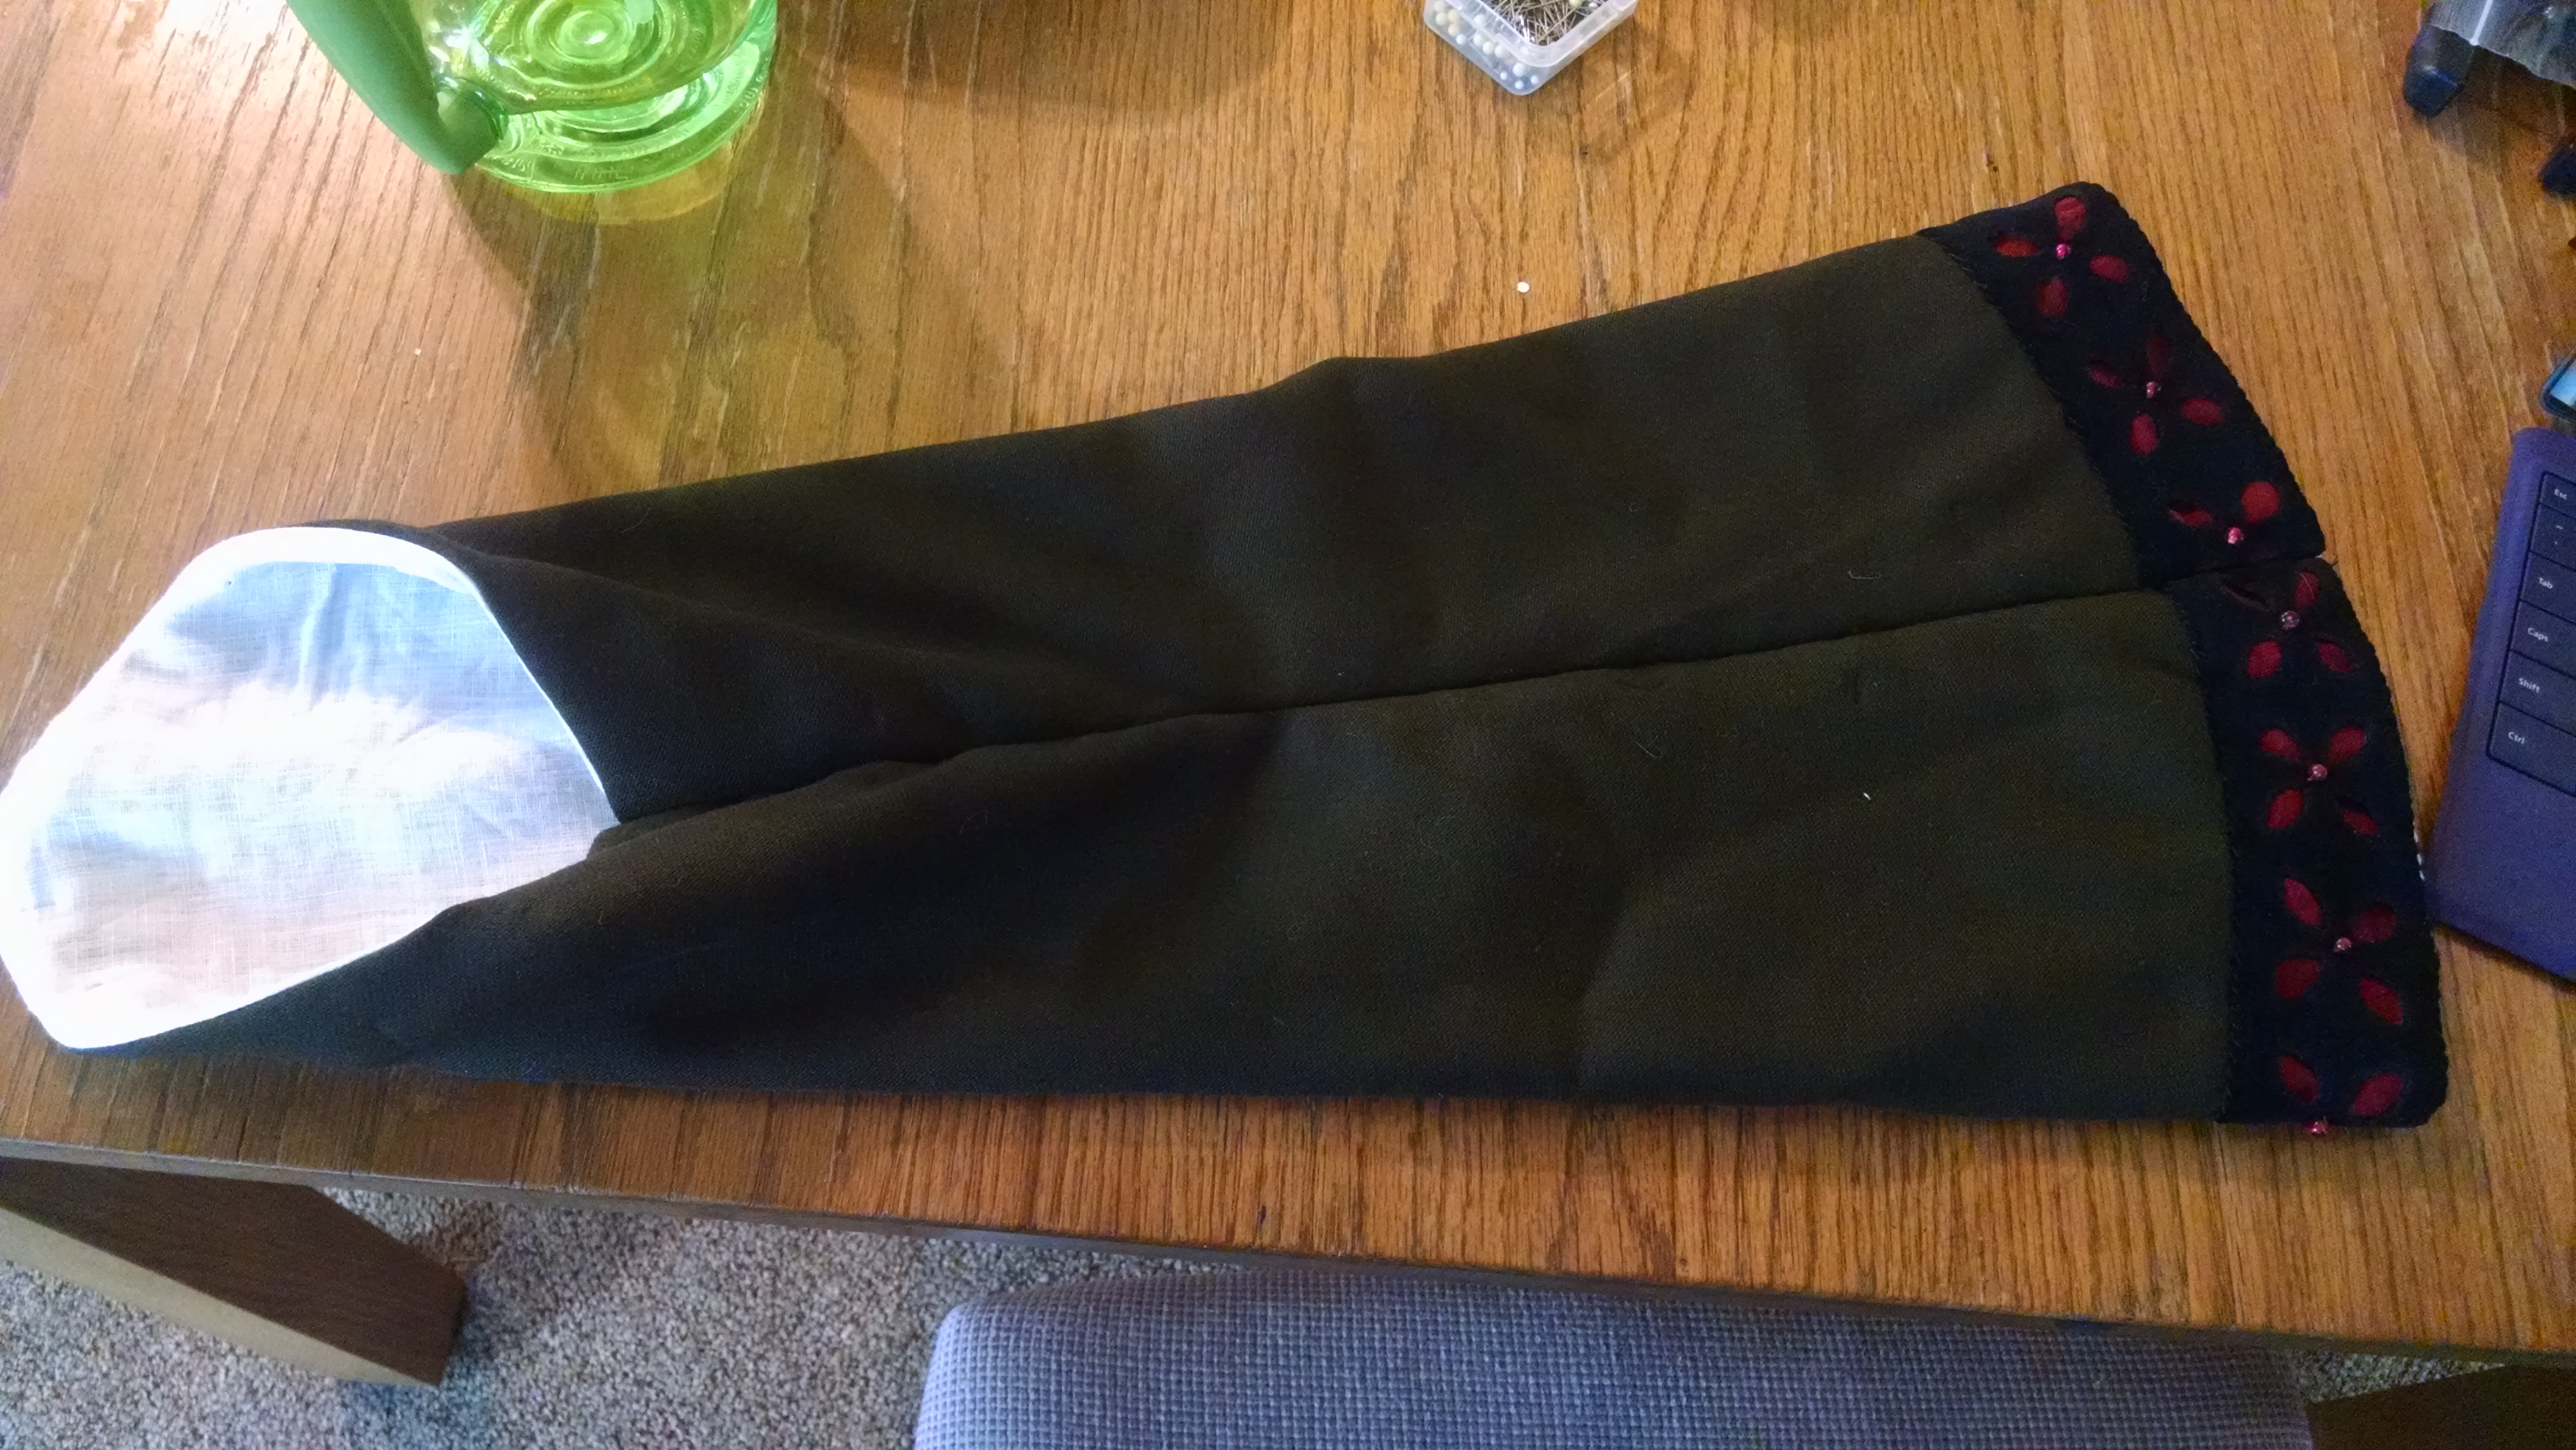
You’ve stuck with me this long, and we’re finally moving on to the sleeves! I wanted to make a gentle trumpet sleeve like in the German portraits. I wanted to be able to roll them up or pin them without needing to take them off, and still have them look elegant. This much easier than the dress part! I just drafted a trumpet shape sleeve and cut out the wool and lined it in linen. The guards are done the same way as the bodice. After I was finished with the guards, I sewed the sleeves closed and attached them to arms scythe by hand.
Guards finished on the sleeves
Sleeves sewn shut
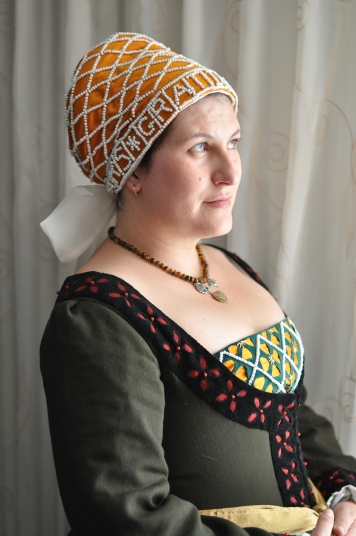
Well, this is the last step, believe it or not! The Brustfleck. This is a simple panel that is a half circle in shape, with lacing rings on the edges. There are also lacing rings sewn into the lining of the neckline for them to attach. It’s really awesome because you can exchange it and have a whole new look. I personally believe that this was used for nursing. With a low square shirt, all you need to do is unlace one side of the brustfleck and the panel swings open like a refrigerator door, ready for baby to nurse without needing to get undressed. This also hold you up like a sports bra, so it was very comfy to wear all day. This design was done the same way I did all the guards, a gold silk backing with green velvet cutouts. The beads in the center are just gold tubes to look like the stamen of the golden poppy, with a grid of white glass beads to frame them.

Stencil prepared on heavy paper.

Velvet is cut out and mounted on the frame.

Beading is completed. Time to remove it off the frame and finish the edges!

Brustfleck is almost finished. Just need to add lacing rings on the edge and hem the top.

Brust fleck on with the gown!
And now, the moment you have been waiting for: the fashion show! I hope you enjoyed this post, even though it was very long. Let me know if you have any questions. I would love to see your German gowns, too!

🙂

❤

From behind

Close up of brustfleck and my Poppy medallion.

The award ceremony.